Quickly create a new document
After opening Illustrator 2025, there are three ways to create a new document: click the “Create New” button on the startup interface, go to the top menu bar and select “File>New”, or simply press the Ctrl+N (Windows)/CMD+N (Mac) shortcut keys. All three methods will open the New Document dialog box, allowing you to start setting project parameters.
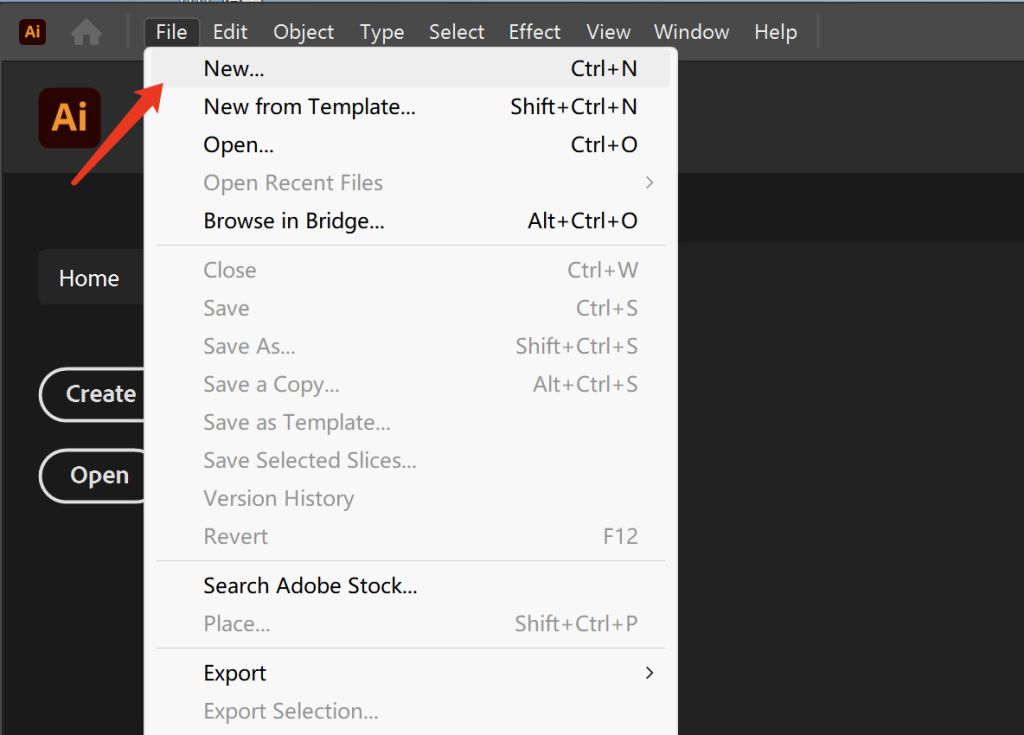
It is recommended that beginners use the shortcut keys Ctrl+N/CMD+N directly, which is much faster than finding buttons!
Document size setting
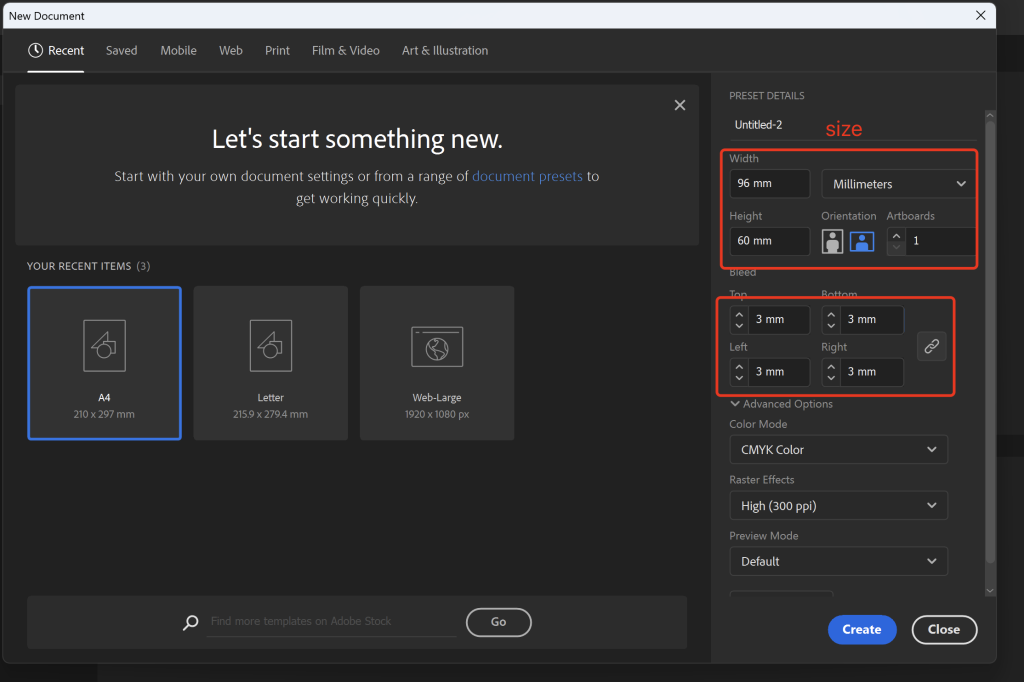
Next, look at the size settings. On the “Preset Details” panel on the right side of the new document dialog box, you can change the size freely:
. Unit switch: click the unit drop-down menu next to the width/height input box, and select mm, pixel, inch, etc. (mm is recommended for printing, and pixel is used for screen design). It is suggested that novices should remember the common units first, and don’t confuse them by switching back and forth.
. User defined width and height: enter numbers directly. For example, design business cards are set to 90mm × 54mm (standard size). If you want to print bleeding, you need to add 3mm (that is, 96mm × 60mm). You see, the 3mm is added to prevent the content from being cut off during trimming. It’s very important!
How to select CMYK and RGB modes
core difference
RGB mode: It is used for screen display, such as web pages, mobile phone interfaces, social media image matching, etc., by mixing red, green, and blue colors to produce more vivid colors. When creating a new document, select the “Web” or “Mobile Devices” category, and the system will automatically use RGB mode. It is suggested to choose this mode for making mobile phone posters and official account pictures!
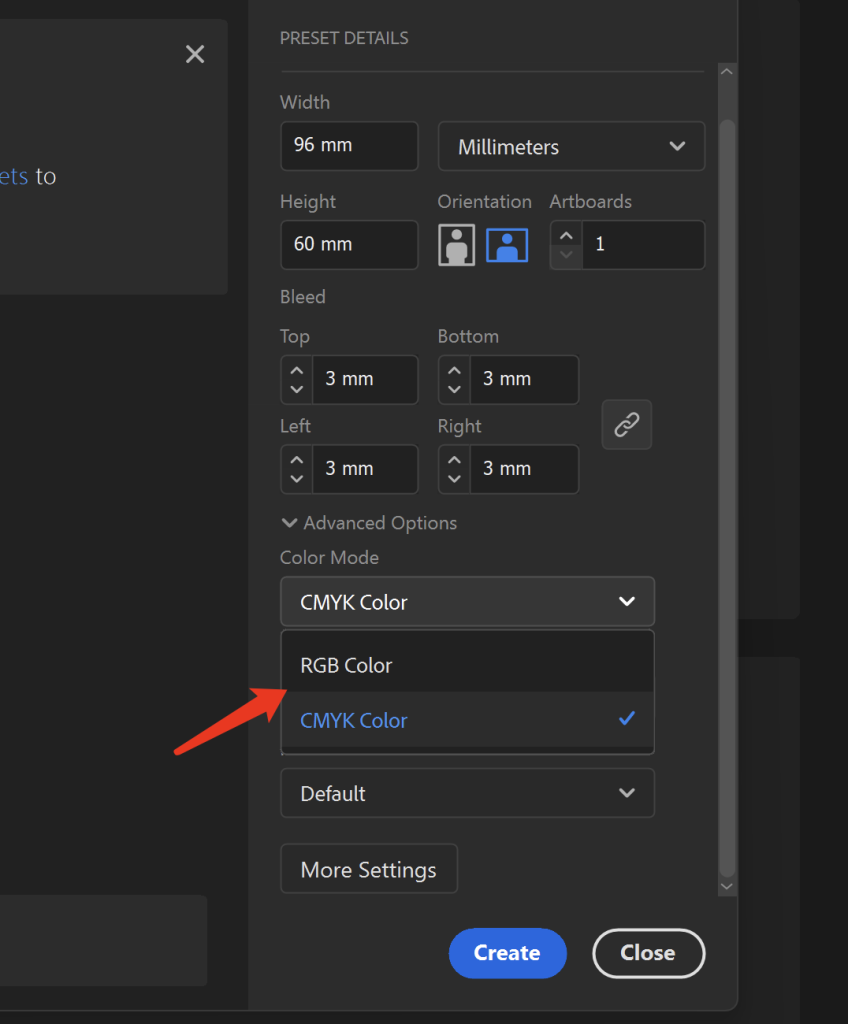
CMYK mode: It is used for printing, such as posters, business cards, and picture books, which rely on the mixing of green, magenta, yellow, and black inks to achieve a softer color. You can use it by selecting the “Print” category, and the clarity needs to be set to 300ppi (a screen design of 72ppi is sufficient). If it’s printing, don’t choose the wrong mode, otherwise the color difference will be far away!
2025 version must learn skills
Actual size preview: Press Ctrl+1 (Windows)/CMD+1 (Mac) to view the design at 100% scale to avoid screen scaling and incorrect question size. This shortcut key must be remembered, and the actual size should be checked after design to ensure reliability!
Canvas background color: Right-click on an empty area of the canvas and select “Canvas Background.” Set different colors to distinguish between different versions (e.g., gray for the initial draft and white for the final draft). This way, you won’t get confused about which version is the latest when making revisions!
Quick template launch: At the bottom of the new document dialog box, you can search for Adobe Stock templates and directly apply preset formats such as business cards and posters, saving you the trouble of setting them up yourself. Beginners can look at more templates to learn about other people’s size settings.
Summarize
In conclusion, when creating a new document, first decide whether it’s for screen use or printing, then select the corresponding category (Web/Print). The system will automatically configure the color mode and sharpness. Features like quick artboard addition and color gamut warnings in the 2025 version will help beginners avoid common pitfalls. Remember: use RGB for screen use, CMYK for printing, and use multiple artboards for multiple design versions—this will prevent your settings from getting messed up!
Comments0