If you’re new to game art and want to create assets with a clean style, this grid tutorial is perfect for you.
This tutorial will walk you through setting up a perfect grid in Photoshop step by step — even if you have no prior experience, you can follow along. Whether you’re designing tiles (referring to game assets used for tiling, such as floor tiles, wall textures, etc.), characters, or environments, this guide, which is easy for beginners to follow, will help you build your in-game world with more confidence.
What You Need:
- Adobe Photoshop (any version with the “Guides” and “Grid” features will work)
- 🕒 Estimated time to complete: 10–15 minutes
- Tip: Switch Photoshop to English
- Whether it’s Photoshop itself or Creative Cloud, switching to the English interface makes it way easier to follow industry tutorials, find tools, and practice like a pro.
- No matter if you’re just starting out or looking to polish your skills, small tweaks like this help you avoid unnecessary hassle. Not sure how to do it? Just follow the guide here!
What is a Grid?
A grid is a system of evenly spaced horizontal and vertical lines used to divide space into regular units, like squares, rectangles, or diamonds (in the case of isometric grids). It’s like graph paper for your game world.

You will find that especially pixel art is tailored to grids and tilemaps.
A tilemap is a grid-based system made up of small square images called tiles. Each tile is a little graphic (usually 8×8, 16×16, or 32×32 pixels) that represents a piece of your game world — like grass, walls, doors, water, etc.
When you arrange these tiles in a grid, you get a tilemap — basically, a full game level made out of reusable pieces.
In games, a grid helps you organize everything:
- Layout
- Movement
- Placement
- Logic
- Visual precision
Step-by-Step: Create a Grid in Photoshop
STEP 1: Create a New Document
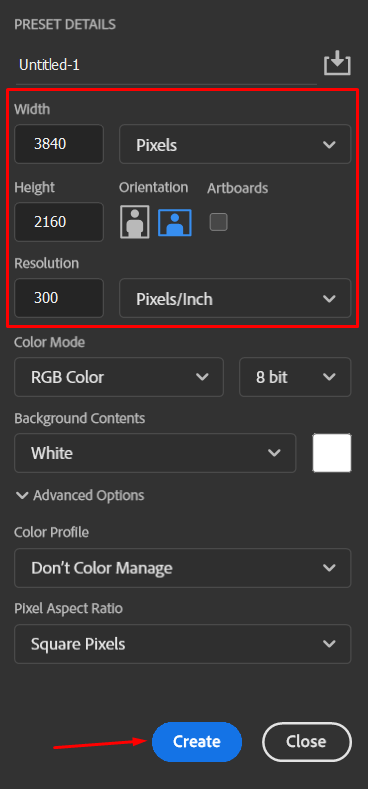
- Open Photoshop.
- Go to File > New.
- Set your canvas size.
- Example for 4k resolution:
- Width: 3840 px
- Height: 2160 px
- Resolution: 72 dpi (for screen) or 300 dpi (for print)
- Example for 4k resolution:
- Click Create.
STEP 2: Set Up the Grid Preferences
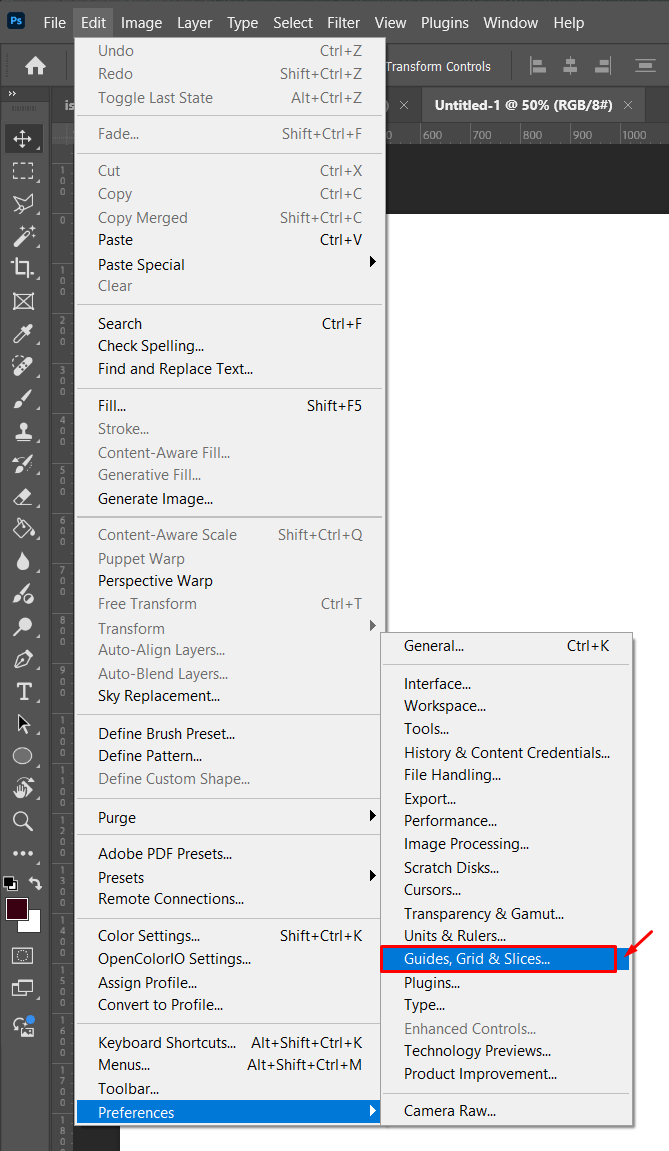
- Go to Photoshop > Preferences > Guides, Grid & Slices (on Windows: Edit > Preferences > Guides, Grid & Slices).
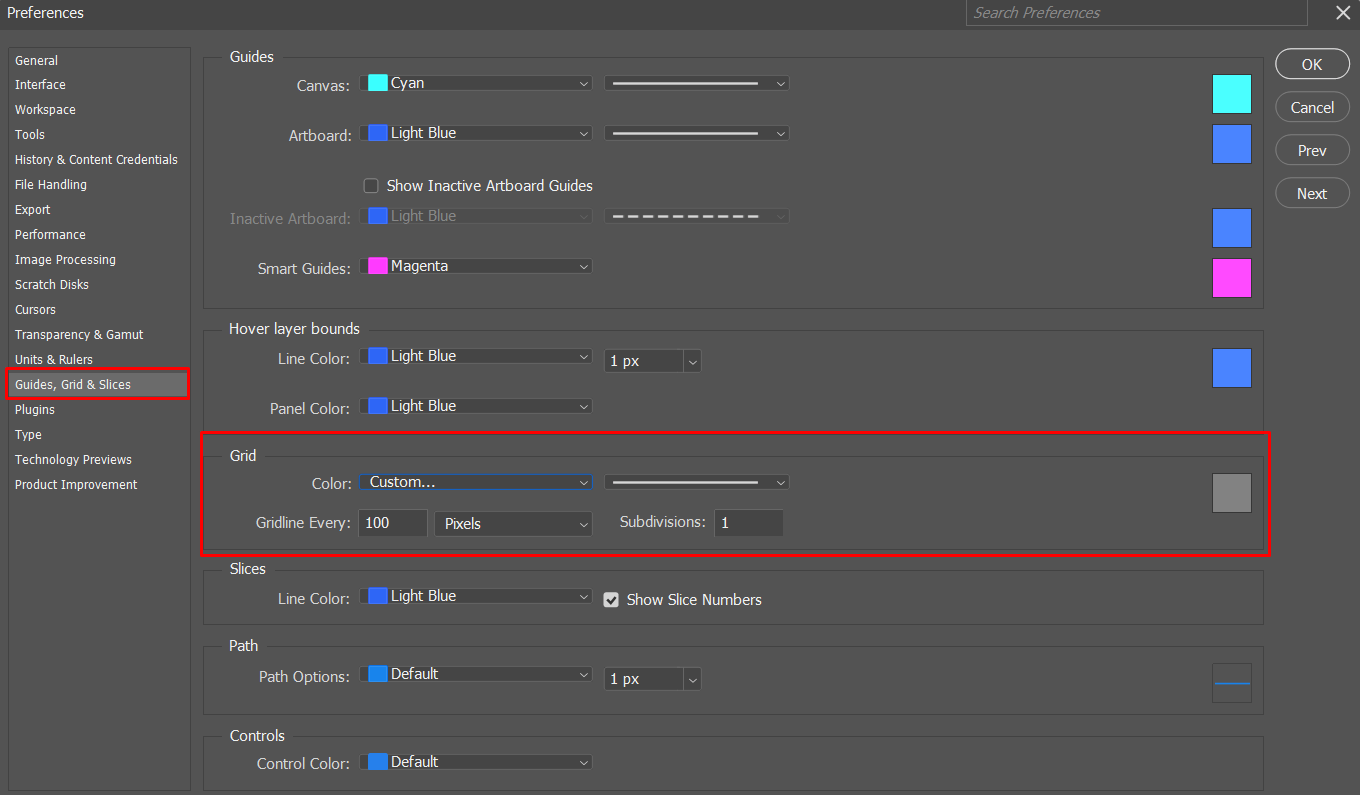
- In the Grid section, set:
- Gridline Every:
100 px(or any base tile size you want) - Subdivisions:
1
- Gridline Every:
- Click OK.
Important: Even a 0.4px mismatch can cause gaps, jitters, or seams inside your engine — especially in tilemaps or pixel-perfect setups.
STEP 3: Turn On the Grid
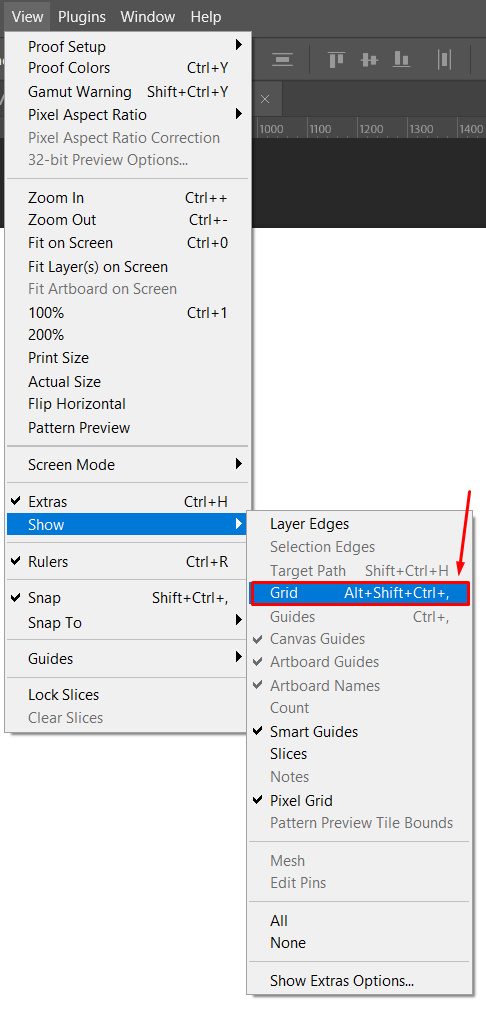
- Go to View > Show > Grid or press Ctrl + ‘ (Cmd + ‘).
- Go to View > Snap to > Grid to help with alignment.
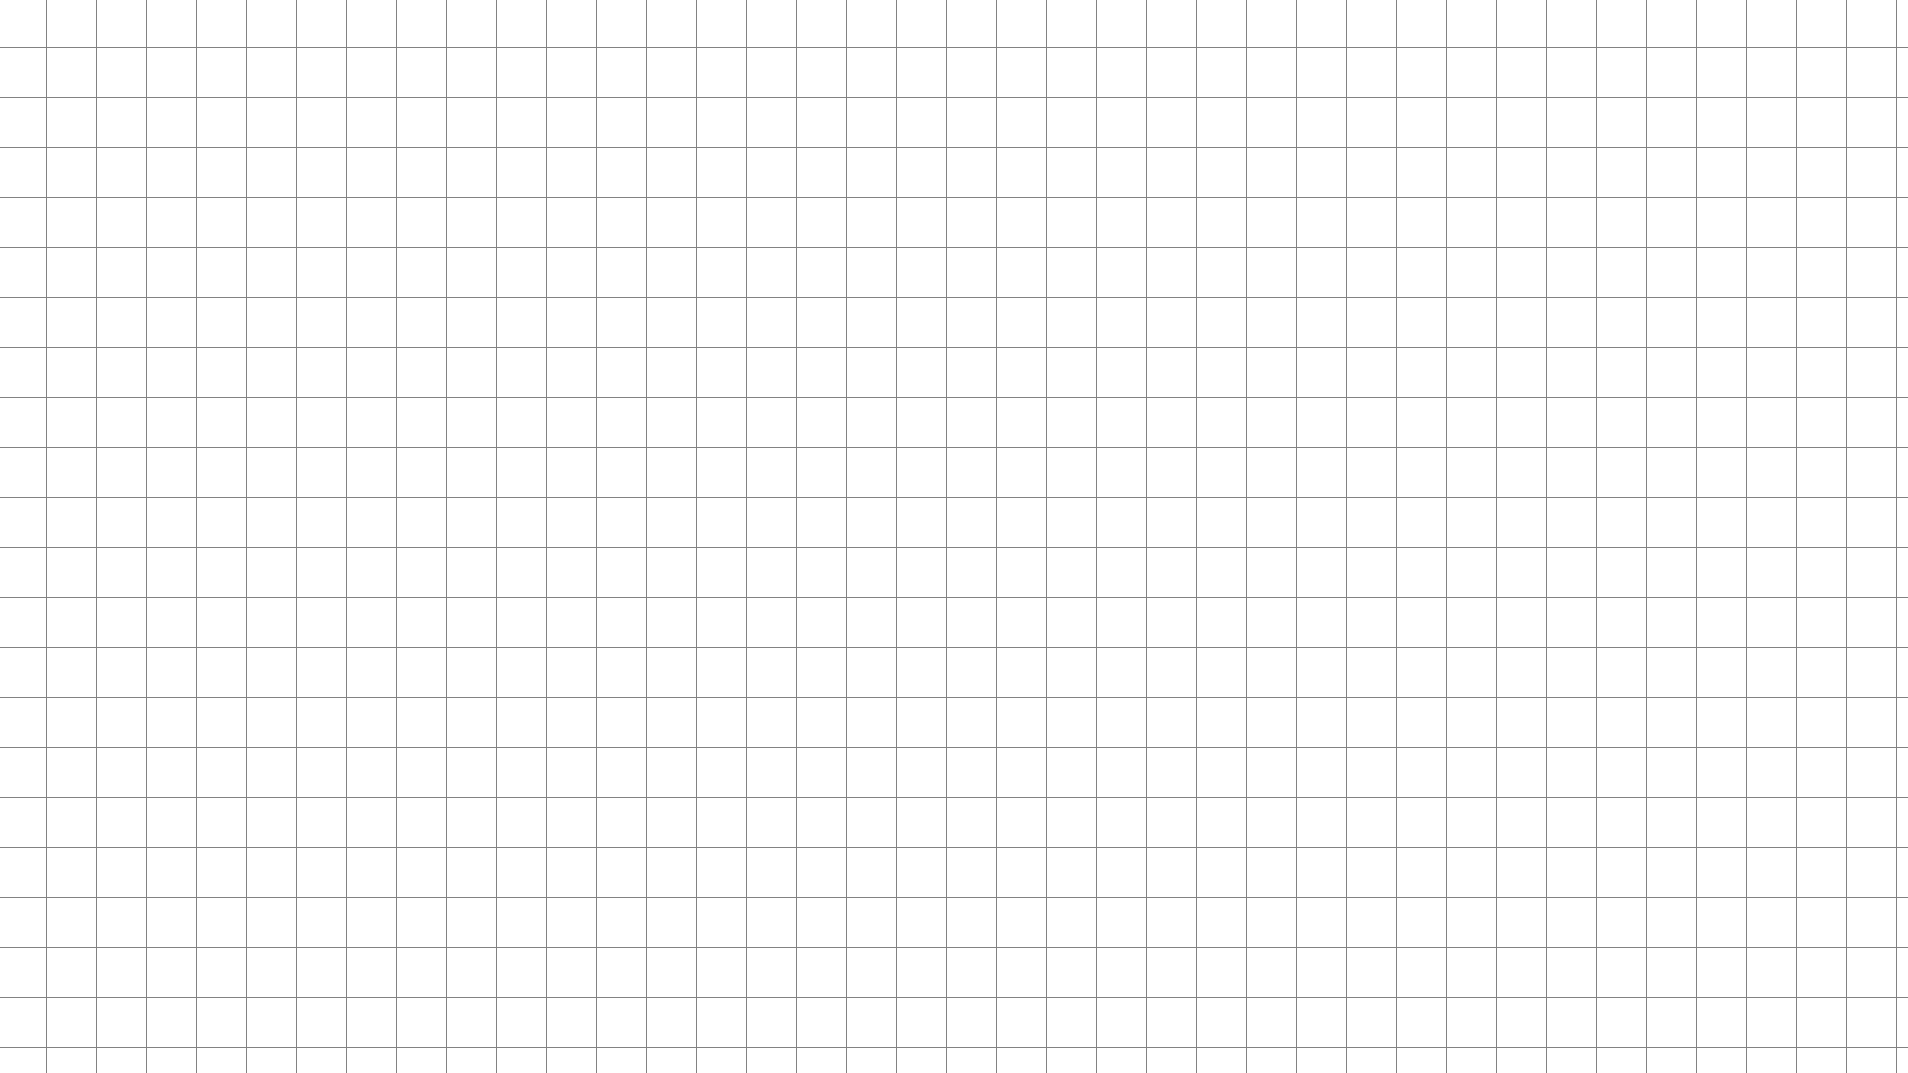
This is how your Photoshop file should look like right now:
Congratulations! You now can use this square grid to create your first artworks and sprite-sheets!
You can use the snap to grid function to create pixel perfect sprite-sheets and export them later.
✅ This gives you a clean, engine-safe tile that aligns perfectly across any number of repetitions, no blurring, no fractional pixels, and no math headaches later.
Now that you’ve set up your rectangle grid in Photoshop, you’re one step closer to building your world. But grids are just the beginning, from prototypes to publishers, there’s a whole journey ahead.
Gentleland is a premium support system and creative community built specifically for indie game developers like you. We help you go from idea to funding, and from passion project to fully functioning studio without burning out or going at it alone.
Comments0