Hello everyone! Today we’ll talk about how to create a new document in InDesign, and clarify all those troublesome settings in one go. Whether you’re a complete beginner or an experienced user needing to review the basics, this tutorial will help you easily master the various parameter settings for creating a new document.
Steps to open the software
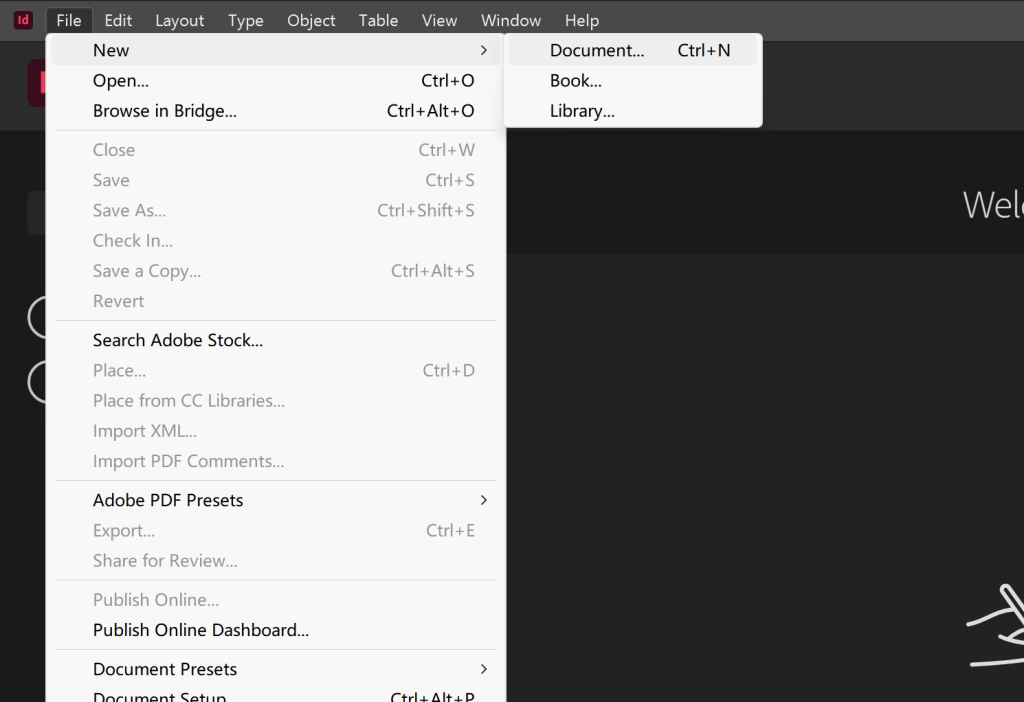
First, double-click the InDesign icon on your desktop to open the software. If this is your first time using it, you might see a welcome screen; just click “New Document.” If you already have another document open, click “File” in the top menu bar, then select “New” → “Document” to bring up the new document settings window.
Size settings
After the new document window pops up, the first step is to set the size. Let’s take a look at the preset options, which include commonly used sizes such as A4, A5, and A3. If you are making common printed materials, just select the corresponding preset, such as A4 for flyers.

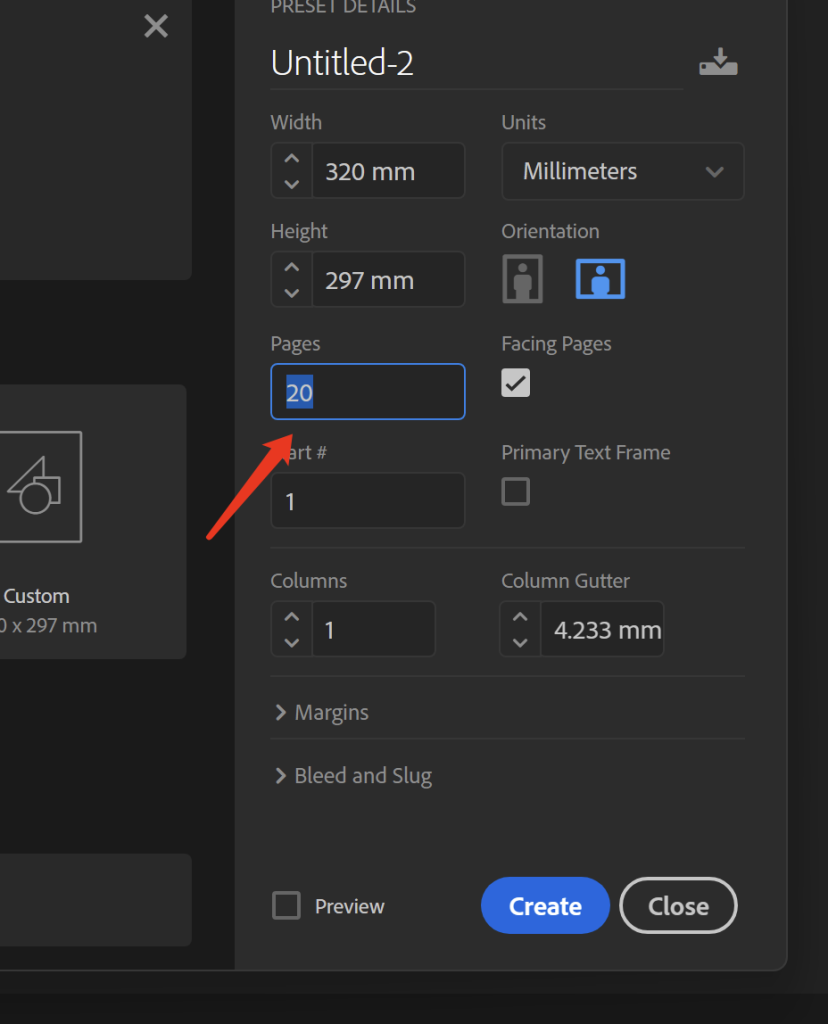
However, if you have specific size requirements, such as creating a poster that is 320×297 mm, you will need to customize the size. Pay attention to the width and height input boxes in the “Preset Details” on the right, and change the values to the size you need. The unit is millimeters by default, so you don’t need to change it.
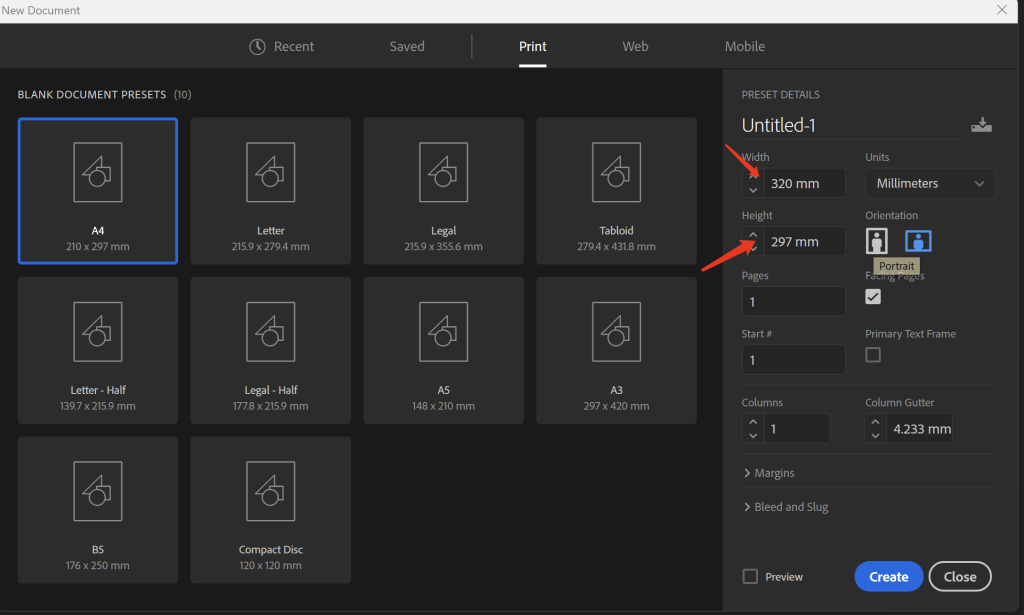
Here’s a little trick: after entering the width, press the Tab key, and the cursor will automatically jump to the height input box, which is very convenient. After setting it up, remember to check the “Alternating Pages” option. If you are creating a document like a brochure or magazine that requires left-right page layout, this option is essential.
Bleeding settings
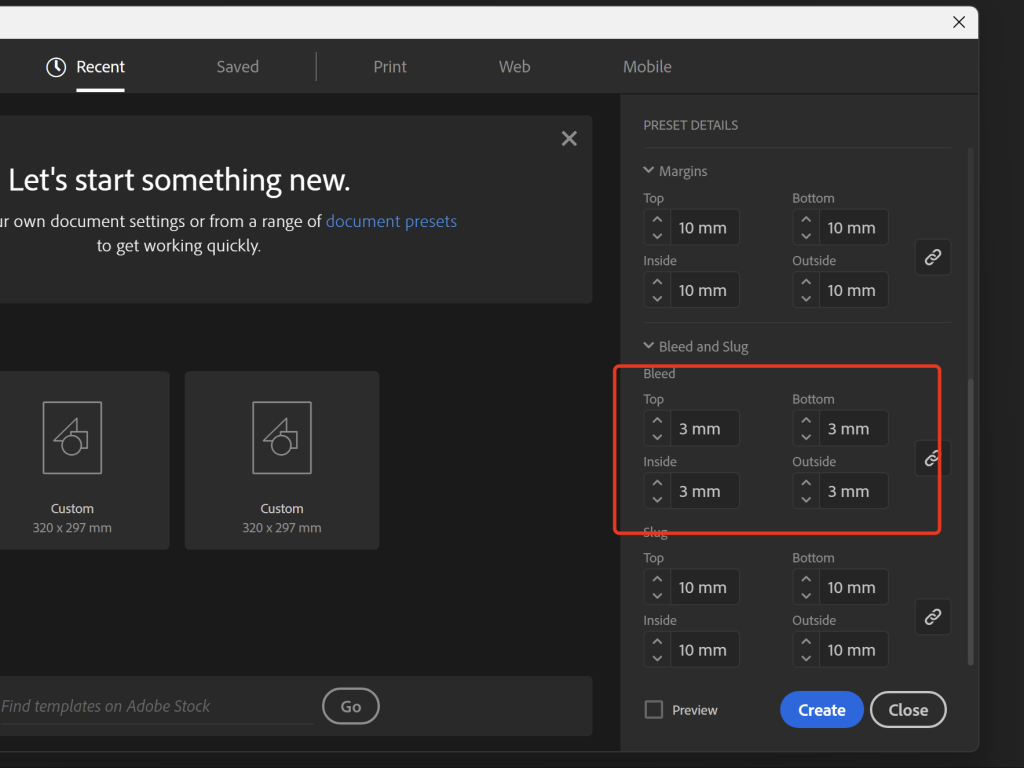
Next is bleed settings, a crucial step in print design, so don’t overlook it! What is bleed? Simply put, it’s allowing images or colors to extend slightly beyond the page edge to prevent white borders during printing and trimming.
At the bottom of the new document window, there is a “Bleed and Auxiliary Information Area”. Click the small triangle in front of it to expand it. Generally, a bleed of 3 mm is sufficient for printed materials. You can directly enter 3 in each of the four boxes: “Top”, “Bottom”, “Left”, and “Right”.
In the illustration, the image without bleed has a white border after cropping, while the one with bleed is perfectly intact. This illustrates the importance of bleed. Remember, for any document intended for printing, always add bleed; otherwise, the printed result may not look good.
Color mode selection
Choosing the wrong color mode can result in significant color discrepancies when printing your design, so this step is crucial. InDesign primarily offers two color modes: RGB and CMYK.
RGB mode is suitable for designs that are viewed on a screen, such as website banners and social media images; CMYK mode is used for printing, such as posters, brochures, and business cards.
Margins and column settings
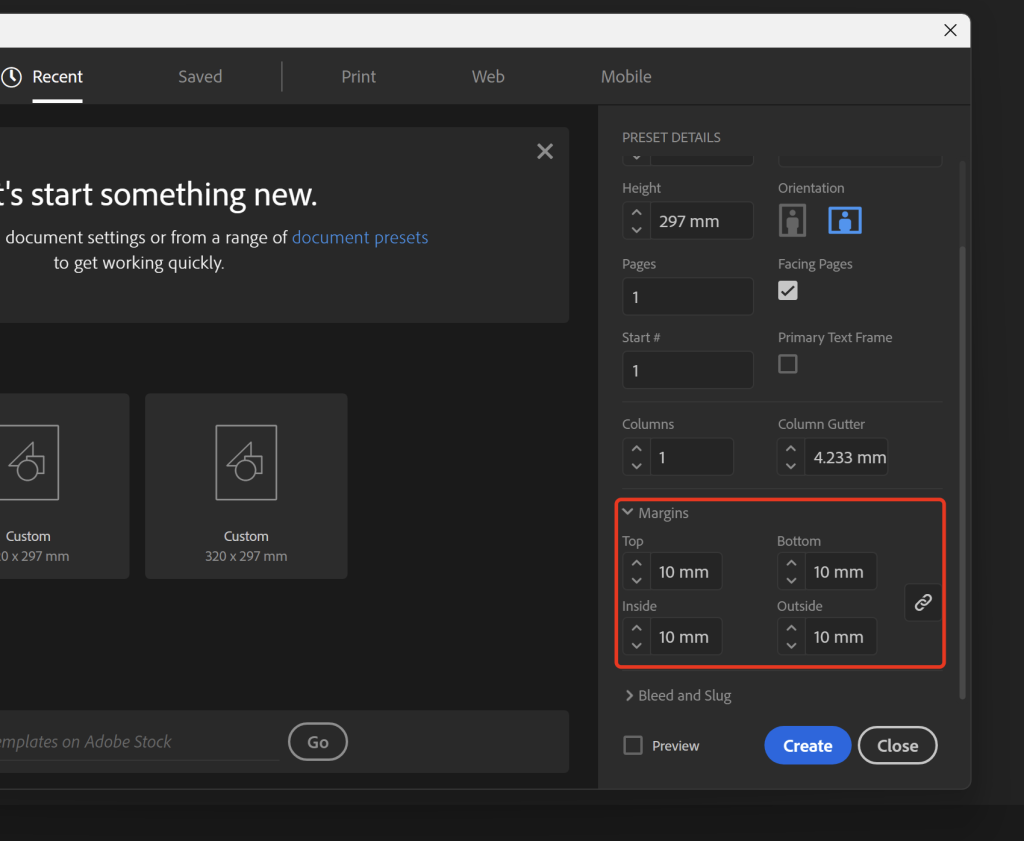
After setting the size and bleed, click the “Margins and Columns” button at the bottom of the window to set the margins and columns. Margins are the white space left at the edges of the page, and columns are how many columns the page is divided into for layout.
Page number settings
Set the number of pages. If you are making a 20-page brochure, enter 20 here. However, you can also add or delete pages here.
Set inspection points
After setting everything up, don’t rush to click “OK.” Let’s double-check. Make sure the dimensions are correct, the bleed is 3mm, the color mode is CMYK (for printing), and the margins and column breaks are correct. Once you’re sure everything is in order, you can click “OK” to create the document.
Methods for saving files
Once the document is created, the first thing to do is save it! Press Ctrl + S (Windows) or Command + S (Mac). In the pop-up save window, choose an easily accessible folder, give the file a name (the default format is .indd, no need to change it). Remember to save periodically to prevent losing files in case your computer crashes, and develop a good habit of saving frequently.
Frequently Asked Questions for Beginners
Finally, let’s talk about some common questions beginners encounter.
Q: Why is there no bleed line in my document?
A: It’s possible you haven’t expanded the “Bleed and Auxiliary Information Area” settings, or you’ve hidden the bleed line in the view. Click “View” → “Show Additional Content” to see the bleed line.
Q: What if I selected the wrong color mode and the printed colors are wrong?
A: If you haven’t printed yet, quickly change the color mode to CMYK in “Document Settings” and then readjust the colors. If you’ve already printed, remember to select the correct mode from the beginning next time.
Q: What if others can’t open the saved file?
A: It might be a version issue. You can click “Save as Copy” when saving and choose an older version, such as InDesign CS6, so that older versions can also open it.
Okay, that concludes today’s InDesign new document setup tutorial. These settings aren’t difficult; you’ll remember them after a few tries. I hope this tutorial has been helpful, and I wish you all successful designs!
Comments0